How To Guide: Clip-In Hair Extensions for Fine Hair
Having fine hair shouldn’t stop you from rocking a fuller, longer hairstyle. In fact, approximately 60% of women in North America have fine hair (pros.samvilla.com), so you’re not alone in searching for ways to boost volume. The good news is that clip-in hair extensions offer an easy, non-damaging solution to transform thin tresses. This expert yet approachable guide will walk you through selecting and applying clip-in extensions so flawlessly that no one will guess they’re not all yours.
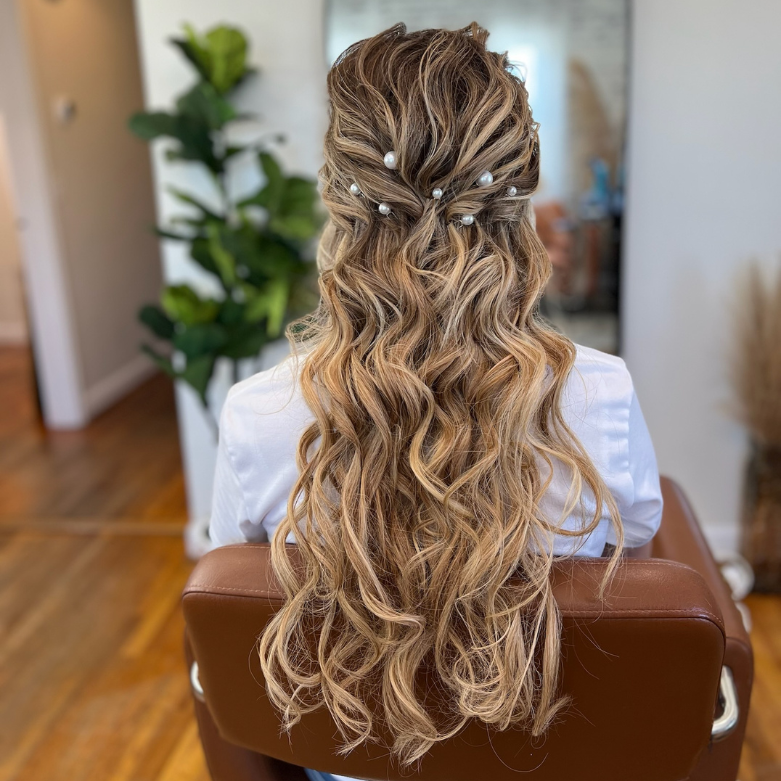
Clip-in extensions can be a game-changer for fine hair. They instantly add the volume and length you crave without any permanent commitment. The before-and-after image below shows how a few well-placed wefts can turn limp, sparse strands into a fuller mane. The key is learning how to apply them so that they blend seamlessly - think “extensions so undetectable, even you might forget you’re wearing them!” Below, we’ll cover how to choose the right extensions for fine hair and provide a step-by-step tutorial (with visuals) on clipping them in for a natural look. By the end, you’ll be equipped to achieve thicker, more voluminous hair confidently on your own.

Choosing the Right Clip-In Extensions for Fine Hair
Not all hair extensions are created equal, especially when it comes to fine hair. For a natural, undetectable look, you’ll want to invest in extensions that are designed with fine strands in mind. Here’s what to look for:
Lightweight Wefts: Fine hair can’t handle very heavy or bulky extensions without strain. Opt for lightweight clip-ins that won’t pull on your roots or feel too heavy. This avoids unnecessary tension on your delicate strands and helps the extensions remain virtually invisible.
Seamless or Thin Bases: Choose clip-ins that have a thin, “seamless” weft (sometimes called an invisible base). These lie flatter against your head so there’s no tell-tale bump. Extensions with the hair sewn right up to the top of the weft blend in better with less chance of the track showing.
Silicone-Lined Clips: Many quality clip-ins (often labeled “for fine hair”) feature silicone-lined clips that grip your hair gently but securely. The silicone adds hold so the clips won’t slip on silky strands, all without damaging or tugging.
Color and Texture Match: For a truly undetectable result, match your extensions to your natural hair color and texture as closely as possible. Look for multi-tonal shades that incorporate subtle highlights/lowlights - this dimensional color helps the extensions blend even if your hair has variations. If your hair is very fine and silky, stick with extensions that have a similar fine texture (100% Remy Human Hair is ideal for a realistic look. You can also have a professional stylist trim or layer the extensions once clipped in, to better merge with your haircut.
Pro Tip: Products marketed for thinning or fine hair often have the qualities mentioned - lightweight, seamless wefts that virtually disappear once applied. When in doubt, start with a smaller set or fewer wefts; you can always add more if needed. Remember, the goal is to enhance your hair’s fullness while keeping it looking 100% natural.
Now that you’ve chosen extensions suited for fine hair, let’s move on to preparing your hair and installing the wefts step by step. Be sure to start with clean, completely dry hair (extensions hold best on dry hair) and have your tools ready!
Step-by-Step Guide: Applying Clip-In Extensions (Fine Hair Edition)
Achieving a flawless result with clip-in extensions comes down to proper placement and a few fine-hair tricks. Follow these steps for an undetectable blend:
Step 1: Prep Your Hair and Tools
Brush your hair thoroughly to remove any tangles; starting with tangle-free hair makes the process smoother. Assemble your extension kit and tools within reach. You’ll need: a rat-tail comb (for parting and teasing), sectioning clips or hair ties (to hold up clipped sections of your hair), a couple of bobby pins (handy for fine hair tricks), a mirror (or two, so you can see the back of your head), and a soft-bristle brush for blending. If your extensions are brand new, gently brush those as well so they’re ready to clip in.
For fine hair, a little extra prep goes a long way toward keeping extensions secure. Add texture at the roots of each section by spritzing a bit of dry shampoo or light hairspray, or gently teasing with your comb. Fine hair tends to be silky and slippery, so this added grit gives the clips something to hold onto. In fact, lightly backcombing the root area or using a texturizing spray before clipping each weft will create the grip needed to keep your extensions in place all day. Once your hair is prepped and your tools and extensions are on hand, it’s time to start clipping in for instant volume!

Step 2: Section Your Hair at the Nape
The secret to natural-looking extensions is strategic placement. You’ll start at the very bottom (nape) of your scalp and work upward in horizontal layers. Using your rat-tail comb or your fingers, part a horizontal line about 1 inch above the nape of your neck (roughly where the bottom of your ears meets your head). Clip or tie the rest of your hair up and out of the way. This first section of hair that you’ve left down will serve as coverage for the lowest extension weft.
Pro Tip: If you have very short or wispy hairs at the nape that tend to peek out, you can twist those small sections and pin them flat against your head with bobby pins. This prevents any tell-tale short pieces from poking out under your extensions, ensuring a smooth look at the base.
Now, take your shortest weft (usually a 2-clip or 3-clip piece) - this will be applied at the nape. Before clipping it in, open all the clips by bending them outward (they make a snapping sound when open/closed). Hold the weft up to the part to measure the fit; it should comfortably span the width of your head at that section. If it’s a bit wide, adjust your part slightly higher. When you’re ready to clip, remember the golden rule: attach the middle clip first, then the sides.

Step 3: Clip In the First Weft
With your bottom section ready, place the center clip of the weft along the parted line at the nape and snap it shut onto the roots of your hair (instructables.com). You should feel it grip securely. Next, gently pull each side of the weft toward the corresponding side of your head and snap the remaining clips closed one by one. Attaching the middle clip first helps keep the weft even and ensures the weft lies flat against your scalp without any gaps or bumps. If a clip doesn’t feel secure, unclip and try again slightly adjusting the placement - you’ll know it’s attached properly when it feels flat and snug, but not painful.
Once the first weft is in, give the hair from that weft a comb through along with your natural hair beneath it. This helps start the blending process. You’ve laid the foundation at the back; now it’s time to add more wefts above it to build volume.
Step 4: Layer Additional Wefts for Volume
Release another horizontal layer of your hair above the one you just clipped. Working upward, continue sectioning your hair in 1-inch increments and clipping in the larger wefts as you go. For example, let down the next layer of hair (about an inch above the first part) and clip the rest of your hair up again. This section will accommodate the next weft (typically a slightly wider 3-clip or 4-clip piece). Again, use the same technique: middle clip first, then sides.
As you move up, make sure to leave enough of your natural hair above the highest extension to completely cover the top weft. In other words, avoid clipping extensions too high on your head where fine hair is sparse. It’s often best to place the largest weft a bit lower than you think near the crown - this way, you have plenty of your own hair left on top to hide the clips. After attaching each weft, let down the next section of hair and repeat. You might use a 4-clip piece across mid-head, then another 3-clip above that, depending on your set. For fine hair, you don’t need to use every weft if it starts to feel crowded; it’s okay to skip a piece to maintain a natural density. The goal is balanced volume - you can always add more wefts if needed, but often less is more for a believable look.
Take a peek in the mirror (use a second mirror for the back if possible) to ensure each weft is fully concealed under the layer of natural hair above it. If you notice any visible weft or bump, adjust the placement or amount of hair in that section. When properly installed, the extensions should feel secure and be completely hidden under your top layers of hair.

Step 5: Add Side Pieces for Blend and Fullness
Now that the back of your head is filled in with extensions, it’s time to address the sides. Side or face-framing wefts are usually smaller (often 1-clip or 2-clip pieces) and they help blend the extensions with the front of your hair for an even, voluminous look all around. To attach side pieces, let down all your hair first and determine where you need a boost. Typically, you’ll want to create a horizontal part a bit above your ear on each side.
Starting on one side, section a small bit of hair above your ear (about an inch above the ear) and clip the hair above that part out of the way. Take a 2-clip weft (or if your set has only 1-clip singles, use two singles per side). Position it about 1/2 to 1 inch back from your hairline - not too close to your face, or the clips might show. Snap it in place so that the weft adds thickness along the side of your head. If you have a second small weft for that side, you can clip it just above the first one, slightly further back toward the side of your head. This layers the side extensions for a smooth gradient of length around your face.
Repeat on the other side: part a section above the ear, and attach the matching weft(s) in the same way, keeping them a bit back from the hairline. These side pieces should sit lower than the top of your head, typically level with or just below your temples, so that there’s natural hair above them to cover the clips. By placing the side extensions slightly behind the hairline, they’ll blend seamlessly with your front layers. Once both sides are clipped in, let down the remaining hair on top. All of your extensions are now installed!

Step 6: Blend and Style for a Flawless Finish
At this stage, your clip-ins are all attached - now it’s all about blending them with your own hair for that flawless, undetectable finish. Start by gently brushing through your hair, combining your natural hair with the extensions. A soft paddle brush or a loop brush (made for extensions) is great for this, as it won’t tug too hard. Brush in a downward motion, and be especially gentle near the roots where the clips are. The idea is to marry the two textures together so they move as one.
One of the best blending tricks for fine hair is to style the extensions along with your natural hair. For instance, adding some curls or waves can work like magic to unify everything. Curling the hair adds volume and helps disguise any minor length differences between your hair and the extensions. You can use a curling iron or wand on low heat (since most quality clip-ins are human hair, they can be curled - just don’t forget heat protectant on both your hair and the extensions). Take sections that combine extension hair and your hair together and curl them as one - this makes the blend seamlessly. Alternatively, even a slight bend or blowout with a round brush can merge the two.
If curling or waving isn’t your style, you can also straighten both your hair and the extensions together for a sleek look - just be cautious with fine hair and use a moderate heat setting. After styling, check all around your head for any visible clips or weft edges. Tease the crown of your hair a little if needed to create lift that hides any bumps, and use a light-hold hairspray to set. The final result should be voluminous hair that looks completely natural. You can run your fingers through it and it behaves like your own hair. Congratulations - you’ve successfully clipped in your extensions for a fuller, fabulous hairstyle!
Optional: If you feel any weft is not sitting right or looks too thick, don’t hesitate to unclasp it and reposition. Fine-tuning placement comes with practice. Sometimes even leaving out a weft (or trimming a weft’s width, if you’re experienced) can make the overall look more natural. It’s all about what suits your hair density and head shape.
Aftercare and Styling Tips for Fine Hair Extensions
You’ve got the extensions in - now make sure to treat them (and your hair) right so everything stays healthy and undetectable:
Be Gentle Removing: Always take your clip-ins out before going to bed. Sleeping in clip-ins can cause tangling and puts stress on fine hair. To remove, start at the top and work downward, unclipping each weft carefully. Never yank - hold the hair near the root as you unclasp to avoid pulling your natural hair.
Give Your Hair Breaks: Clip-in extensions are meant for temporary use. For fine-haired gals, it’s wise not to wear them every single day. Let your natural hair rest frequently - for example, wear extensions only a few days a week (say, weekends or special events) and go without them on other days. This prevents any prolonged stress on your strands and scalp.
Care for the Extensions: Gently brush your extensions after each use and store them flat or hanging when not in use (to prevent tangles). Wash them only after ~15-20 wears or if product buildup is noticeable. Use a sulfate-free, gentle shampoo and lukewarm water, and let them air dry. Proper care keeps them soft and helps them continue to blend with your hair.
Blend with Styling: As mentioned, styling can enhance the illusion. If your hair is on the finer side, even a simple trick like curling the ends of both your hair and the extensions together can create a cohesive texture. Experiment with waves, curls, or even braiding small sections - these add body and camouflage the point where your natural hair ends. Just avoid super sleek high ponytails or updos that might reveal the clips; instead, opt for styles that keep the extensions covered (low ponytails, half-up styles, and down-dos, for example).
Monitor Your Comfort: Fine hair can be more fragile, so pay attention to how your scalp and hair feel. The extensions should not hurt or cause headaches. If they do, they might be too heavy or too tight - in that case, use fewer wefts or reposition for comfort. Also, check your hair after removal for any signs of breakage (properly applied clip-ins shouldn’t cause breakage, but if you notice issues, consult a stylist for guidance on technique or consider lighter extensions).
By following these tips, you’ll keep your fine hair looking and feeling healthy while enjoying all the benefits of clip-in extensions.

Product Recommendation: Barely Xtensions - The Best Clip-Ins for Fine Hair
Barely Xtensions was made for fine-haired individuals seeking a natural boost. The name says it all - these extensions are “barely” detectable. Made from 100% premium Remy Human Hair, Barely Xtensions are soft, silky, and blend beautifully with your real hair. The Ultra-Seamless weft design lies super flat against the scalp, which is exactly what fine hair needs to keep the secret under wraps. The clips have a gentle silicone grip, so they stay in place on fine strands without slipping or causing damage.
Another reason that makes Barely Xtensions stand out is the multi-dimensional coloring and variety of shades. It’s easy to find a perfect color match (or mix of highlights) for a truly undetectable blend. BX also comes in affordable sets that won’t break the bank, making luxury-quality extensions accessible for everyone. Whether you’re looking to add a bit of volume for a special occasion or want everyday fullness, Barely Xtensions provides the length and thickness you desire while remaining lightweight and comfortable for fine hair. In short, if you’re ready to invest in clip-in extensions, Barely Xtensions is a top-tier choice to achieve that “my hair but better” look. Give BX a try - your hair will thank you for it!